

Video Walkthrough
Level One - So it Begins
Before even thinking about going to Level Two you will need to hit the Yellow Switch Palace. Go to the left and enter Level One
You're Already Dead
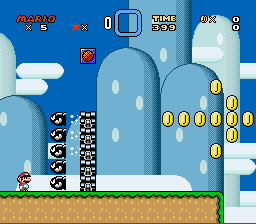
After entering the level five bullets will immediately shoot at Mario. There's two ways to survive the bullets:
- Spin Jump though one of the Bullets
- Run slightly to the right to build momentum; then, jump. During the jump, go left, so you can clear the bullets.
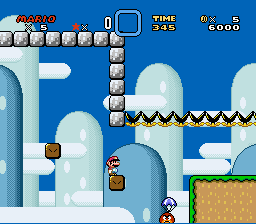
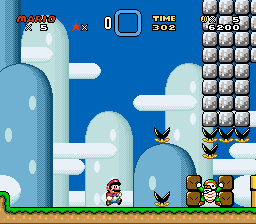
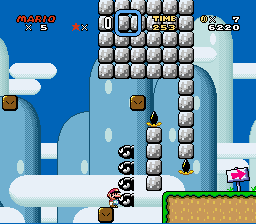
After clearing the bullets there's an info block on the top of the bill blasters
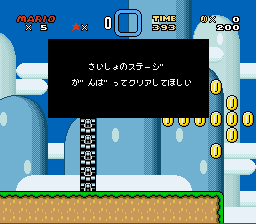
"Please do your best to clear the first stage"
http://www.rllmukforum.com/index.php?showtopic=167174
Mario does the Matrix!
You may notice an arrow made of coins. They do not lie. To continue with the level Mario must jump across the canyon by hopping on the bullets shot by the bill blasters.
To clear the jump, you must go to the right of the platform and wait for the bill blasters to fire the set of five bullets. Once they fire start running to the right. Jump at the edge of the platform and hop across the valley on top of the bullet bills.
You need to time this pretty well. The valley is just wide enough for Mario to clear after jumping on all five bullets. If you jump too early you'll make it just short of the next platform and die.
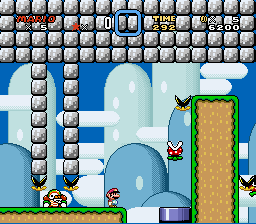
Who left this stuff on the platform?
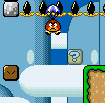
After making the Matrix Jump you will need to jump over the spinies that are on the other side.
On this platform is some chompers and a charging chuck. The chuck will split into three chucks and charge after you. They will jump if they run into a chomper; be careful so one doesn't jump on you.
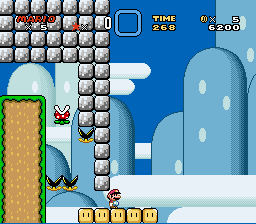
Floating over no land
There will be some Koopas that you will have to jump across to reach the next area. The only platforms are already hit coin blocks so it's easy to fall off here.
There are two charging chucks here. One will hop up when you jump over him, the other will jump toward Mario. Don't let them knock you off the small platforms.
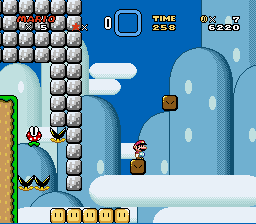
The Goomba Jump
After clearing the charging chucks there will be an innocent goomba floating down off the platform. If you're not quick enough he'll disappear. If this happens you'll have to go back to the left so he can re-spawn off-screen. The next jump is impossible without jumping on the goomba.
You'll need to short jump to the goomba; then, short jump onto the platform. If you hold the jump button too long on either jump you'll boink your head on chompers and die
There is an invisible coin block waiting for Mario that is touching the ledge. If you hold right the entire time during the goomba jump you will almost certainly hit it, resulting in your death.
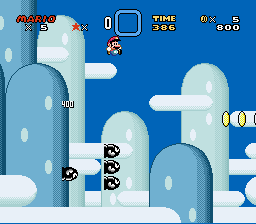
Bob-ombs
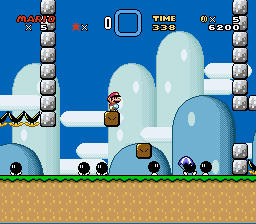
After clearing the goomba jump the bob-bombs infesting the next area will try to kill Mario.
If one is in your way you can short spin jump on him. Any other jump will cause Mario to leap too high and ram his hat into a deadly chomper.
Once you're clear of the chompers jump on a coin block and let all the bob-ombs blow themselves up.
First class ride on the spiny
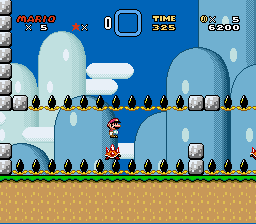
Chompers infest the next area. Mario is unable to cross this section of the platform unless he takes a ride on a spiny.
Spin jump on the spiny. Don't hold the spin jump button unless you want to suffer death by a plant. Take care so you don't fall off the spiny.
You'll have to ride three spinies before making it to the next area.
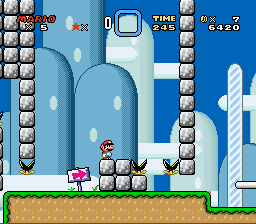
Midway point
There is a midway point after the chompers. Grab it so Mario becomes big.
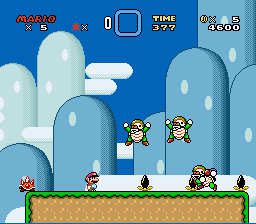
There are some chompers and a jumping chuck ahead. If you have a mushroom you can run past this, take the hit, and go as far as you can using Mario's invisibility frames. Otherwise you'll have to carefully jump toward chuck; then, run across the top of the coin blocks. Jump carefully, otherwise chuck will clap Mario and squish him into red-eyed submission.
Chuck's Trap
The next obstacle will show up often throughout Kaizo Mario. There is a jumping chuck surrounded by two walls with chompers at the bottom of the wall. Chuck will only jump if his hands are on the ground. You have to jump near him to cause him to jump; then quickly run underneath him.
Down the Plant hole
After chuck's trap there are two piranha plants around a tall platform. The first one comes out of a pipe. To proceed, you'll spin jump on the piranha without touching the chomper hanging off the ledge.
One platform
From the tall platform you'll need to jump to the folding platform below. Some chompers and a piranha plant are in your way. To clear the fall you'll need to spin jump on the piranha and slowly descend. You can only land on the folding platform when it folds out. If it's folding in when you get near the chompers jump out of the hole. Otherwise carefully move toward the platform before the piranha plant rests with the chompers.
The coin blocks help
You will be using coin blocks to help you here

On the folding platform approach the right side of the platform when it folds out. Jump to revel an invisible coin block.
There is another invisible coin block to the right of the first one. It is possible to reveal it without dying but it usually isn't worth the trouble.
From the first or second coin block jump to the right. There's a lone coin block to the right that you will land on.
After landing on the platform jump, again to clear the bullets that come your way. Use that jump to make it to the next coin block.
Only chompers stand in your way.
The last thing in your way before you clear the level is two chompers side-by-side. You'll have to jump carefully in-between them. Afterwards, run to the goal to beat the first level.
Congratulations! Everything that can kill you probably did if you beat the first level! Told you this walkthough would only warn you about the obstacles!
Last Level | Next Level | Top